Study for Meditation Mat

Study for Meditation Mat
Handspun Tapestry Weaving

Wednesday, 29 July 2015

Somewhere Over the Rainbow 2015: Weaving with a Ball of Hand Dyed Singles

We had two days of much needed rain, although we could have done without the high winds which accompanied it. The weather was perfect for weaving, so I thought I would show you what I do with those balls of multi-dyed singles that I spin. I set up one of my small Forsythe frame looms with a commercial cotton seine twine warp, selected a ball of yarn which appealed to me and began to weave, without a cartoon or any plan at all, apart from demonstrating how I work with the range of colours available to me in a single ball of yarn. In this photo, you can see the variety of colours in a single skein, which I wound into a centre pull ball:


I have several options when using this yarn; I can work from the inside or the outside of the ball or I can select random sections by winding off yarn until I get the colours I want. In this case, I decided to work from the outside and the inside of the ball, taking the colours as they came to me. I began with the outside of the ball. Working across the width of the tapestry produces subtle stripes, as shown at the bottom of the sample (tentatively named, "Badlands"):


Once I begin to work over smaller areas, the stripes become more evident, shifting into blocks of colour, depending upon the techniques I use (slits and eccentric wefts here). You can see this happening on the left side of the tapestry. If I want to emphasize a particular section, I use an outlining technique - in this case, soumak.

For the background colour (the blue shown here), I wove using yarn from the centre of the ball. I prefer to have a clean surface on both front and back of my work, but in order to maintain a smooth colour transition in the sky, I floated my yarn behind the hoodoo image at centre right. The colour shifts from blue to light pink, at which point, I began weaving with yarns from the inside and outside of the ball. The inside yarn is on the left; the outside yarn is on the right:


You can see the hatching in the centre of the piece and my use of eccentric weft weaving to suggest movement in the sky. The hatching is barely noticeable, but there is a clear difference between the left side and right.

There are a few things to remember when working with multiple colour transitions:

  • When dyeing fibres, make your colours stronger and brighter than you require in your yarn. Spinning with multiple colours mutes everything. If your colours are too subtle, especially if you spin using complementary colours, your yarns will appear muddy and will become more so in your weaving. Choose your colour sequence wisely.
  • Stripes become more prominent as the weaving width covered by the yarn narrows, eventually becoming blocks of colour. The longer your colour runs, the bigger the blocks, so when spinning your yarns, pay attention to the length and order in which you spin your singles. If you want precise placements and shapes, you will have to measure your fibres as you spin. This defeats my intent to make less work for myself, so I eyeball my colours as I spin. 
  • If you want to maintain continuity in your colour transitions, the end which comes off the ball last is the end that goes through the eye of the needle (or is the first to be wound on your bobbin or butterfly). This ensures that the last end off the ball will also be the last end woven. If you aren't concerned with maintaining the shifts, you don't need to pay attention which end came off the yarn package last. 
  • Sample. Sample a lot, especially if you intend to weave larger pieces or if you want to weave specific shapes. Designing with the colours in the yarn is not a beginner's practice. It's easy to get pleasing colours when weaving random sections in a tapestry, but controlling those colours requires paying attention to how the yarn is spun and how that yarn is used in the fabric. Transitions are affected by warp sett, weaving width, beat and techniques. All these things and more affect the final appearance of your work. 

I hope this gives you some idea of how to work with rainbow dyed colours in tapestry. In case you're wondering: "This is all very well for free form weaving, but can I do this if I'm working with cartoons, specific images and larger pieces?" the answer is, yes, you can and I will have more on that in future posts.

Namaste.


Wednesday, 22 July 2015

Somewhere Over the Rainbow 2015: Spinning Yarns

My last post walked you through one of the dyeing techniques I use for my hand spun tapestry singles yarns. Once I’ve rainbow dyed, washed and dried my Romney fleece, I sort it into locks and more jumbled fibres. Both sets of fibres will be used to spin tapestry yarns, but I treat them differently. Individual locks are divided into colourways for spinning from the lock, either as is or after combing with a dog comb. The rest of the fleece will be carded or combed on wool combs, depending upon its end use.

Spinning from locks retains the beautiful lustre of this Romney fleece and allows me to produce colour gradients, either subtle or distinctive, in my yarns. It is also easier for me to produce yarns which mimic tapestry techniques when I spin from locks. Tapestry woven with lock spun wefts has a smoother surface and higher lustre than tapestry woven with woollen yarns; however, the strength of the yarn and the parallel arrangement of its fibres mean that the wefts don’t pack as well over the warp yarns. As I've mentioned in previous posts, I do a lot of needle weaving and don’t use a shedding device very often, so I sometimes find that worsted singles shred as I weave them over and under the warps, usually when I set up a linen warp. While woollen yarns may pill in the shed, worsted yarns tend to drift apart all at once, so I have to work with short pieces of yarn and overlap my joins well. In most cases, this isn’t a problem – my pieces are small and require only short wefts and experience has taught me to anticipate any yarn drift which I can prevent by rolling the yarn between my fingers in the direction of the twist as I weave.

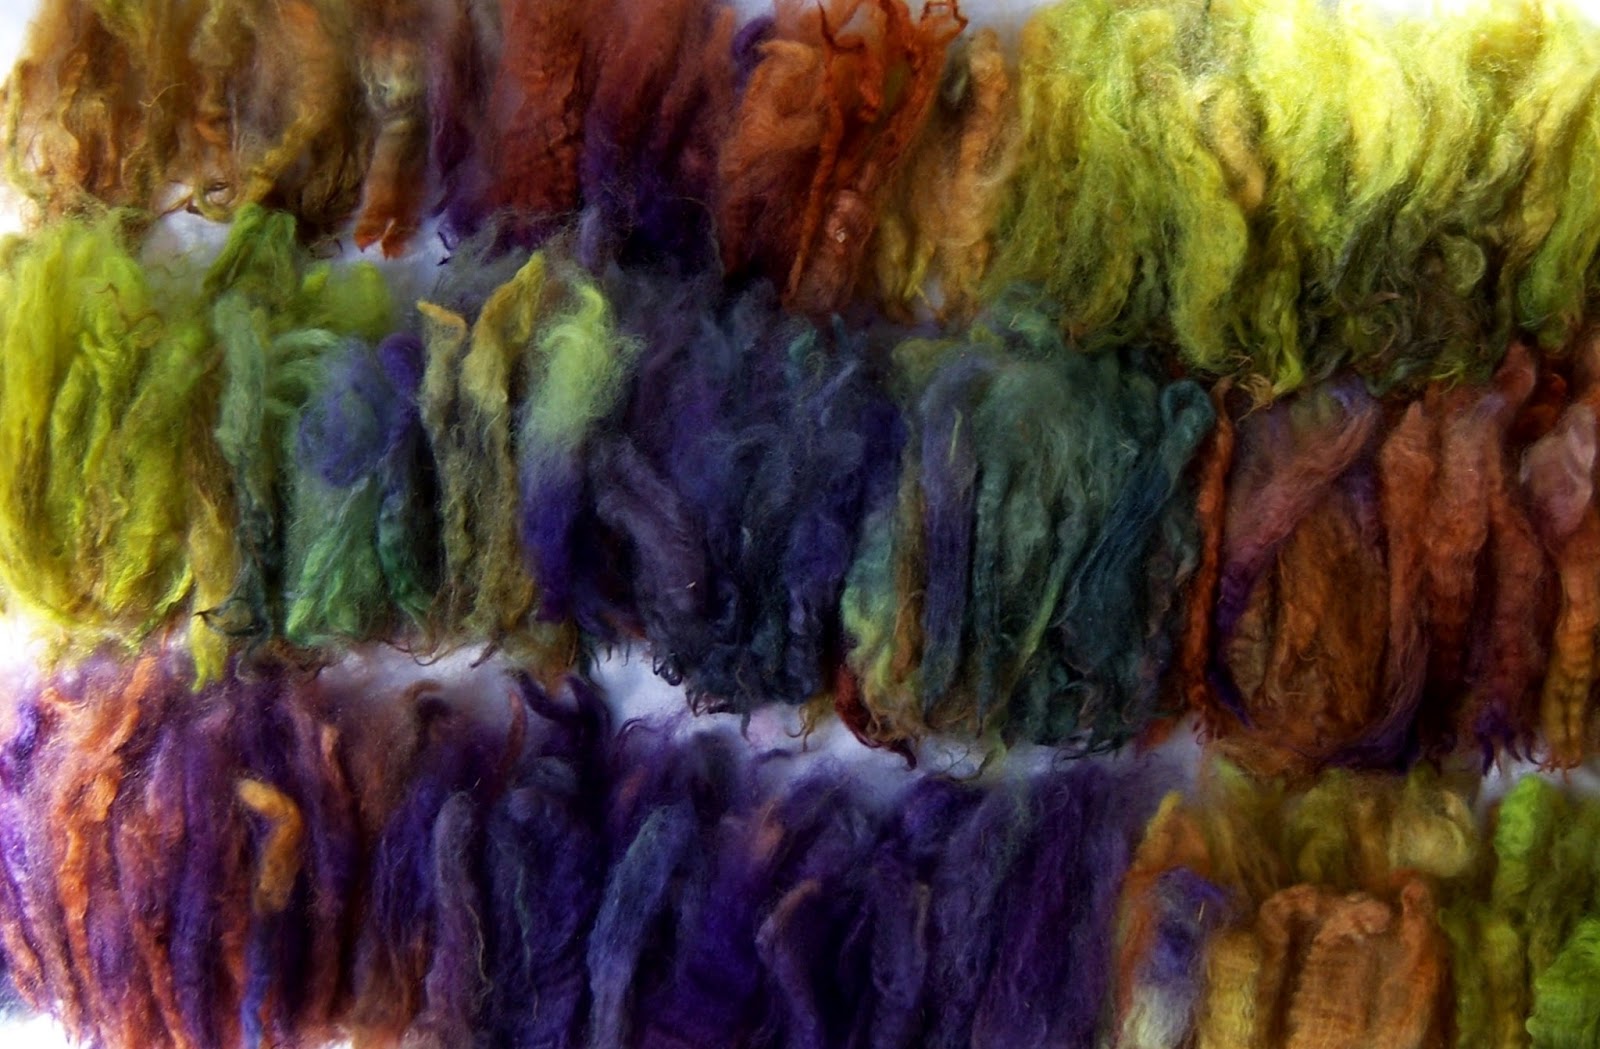
All of the yarns from this batch of dyeing were spun Z, cut end to tip on a top whorl spindle. This photograph shows Skein #1, spun directly from locks which were opened at the cut end, but which had no other preparation.  This yarn is slightly more textured and fuzzier than the next two larger skeins, which were spun from dog combed locks. Note the PVC niddy noddy – after spinning the yarns, I wind them on these noddies, twist the noddies flat to produce more tension on the yarns, then wash and dry them on the noddies.The locks below are the original colours in this skein. If you are planning a colourway using this technique, remember that the colours are stronger and brighter in the locks. Colours opposite on the colour wheel will blend to produce browns; equal amounts of opposite colours can muddy otherwise clear colours. Experiment a bit before you spin an entire batch to determine which colours work well together and how gradually you want your colours to transition.


This batch of lock spinning produced approximately 475 yards of worsted style weft yarns. You can see the strong colour shifts in the larger skeins. Depending upon the effect I want, I can use these yarns from either end or from the centre to place the colours where I need them. If I decide that I want a gradient shift in my colours without using tapestry techniques – such as winding multiple colours on a bobbin and then dropping or changing out colours as I weave – I spin fewer locks of any one colour and make them into smaller skeins which can be woven as is across the web. (This then begs the question: am I weaving tapestry, i.e., discontinuous weft-faced weave or am I weaving rugs? I’m not a purist and tend to go with whatever works best for me.)


There you have it – step two in the long, but rewarding process of weaving tapestry from hand spun singles.

Namaste.

Wednesday, 15 July 2015

Somewhere Over the Rainbow 2015

Late yesterday afternoon, I dyed some Romney fleece from my favourite local supplier, Meegan Linklater, of Rousay Station. Meegan's Romney is always lovely - clean, bright, long stapled with great lock formation and strong. It has a wide range of uses, from garments to tapestry yarns, Although it's quite heavy with grease, it dyes beautifully, with lustre that highlights the silkiness of the locks. It's perfect for rainbow dyeing.

I rainbow dye most of the fibres I use for tapestry yarns. I like the unpredictability of the colours, the way the hues blend and the fact that the colours in a rainbow pot always go well together. I spin singles for tapestry weft. The colour transitions in the yarns often substitute for traditional weaving techniques; judicious placement of multi-coloured wefts can mimic the nuances of hachure, for example. Working with multi-coloured singles can make my tapestries appear more complex than they are and I'm all for using illusion to my advantage.

Rainbow dyeing involves nothing more than filling a dye pot with a small amount of hot water, several glubs of vinegar (or other acid), then stuffing the pot with raw fleece. (You can rainbow dye with any fibres or even yarns, washed or not, but acid dyeing with raw fleece is my preferred method.) You then sprinkle acid dye powders in several places on the fleece, heat the pot to a simmer and walk away. There's no stirring, no mixing of dye powders, no more than a bit of judicious poking if the powders don't dissolve. Once the fibres and dyes have simmered for approximately 20 minutes (which varies according to the dyes you use), you turn off the heat and allow the pot to cool over night. You then rinse or scour the wool and allow it to dry. I prefer to wash this Romney without a cleaning agent as I prefer the feel of the grease in the wool. That grease is removed when the yarn is washed and set, so it doesn't affect the woven fabric.

Once the fibre is cleaned, I separate it into batches of locks and fibres to be carded, then into colour groups. Here's the current batch ready to be sorted:


Here are the locks sorted into colour groups:


What doesn't sort into locks will be spun as is for textured yarns or carded and spun into colour blends:


Of course, I would not be as successful at all of this were it not for the faithful Morris, who watches over all events in our backyard. (Really, he's hoping we'll turn on the sprinkler so that he can play in it, He's broken so many sprinkler heads that Mr. DD designed one specially for Morris, built from a hockey puck and a piece of plastic plumbing tubing. At least now, when Morrie bites at the sprinkler, he won't hurt his teeth.The old boy turned nine at the beginning of the month, but you'd never know it when he's romping around in the water.) 


Namaste.

Saturday, 11 July 2015

Hot Summer Days: Working With Wool

The smoke from distant fires has cleared here, but we're into hot weather - the past few days have been in the mid 30's C range (up into the 90's F, which is plenty hot for us). We don't have air conditioning, so it's warm inside, too, a bit warm for spinning or weaving or doing much of anything except reading and sipping cold drinks.

A few months ago, my friend, Joan, gave me a book, Sylvia Olsen's Working With Wool: A Coast Salish Legacy & the Cowichan Sweater.  These world renowned garments have a complex and interesting history, as do the women who make them. Coast Salish people once wove heavy blankets of two ply mountain goat and dog hair. These blankets were important, if not the most important, cultural products of the people. The blankets were used in potlatch ceremonies, giveaways and rites of passage; they held great cultural significance. Blankets became trade items as contact with the Spanish and British grew, but colonization and efforts to assimilate indigenous peoples brought an end to their production. Salish women took pride in keeping their hands busy and in working with wool; when the settlers introduced knitting to the West Coast of British Columbia and the United States, Salish women adopted knitting as their own and developed a style of sweater that became known as the Cowichan. These sweaters, made from thick hand spun singles wool, became a way to support their families as government policies drove the peoples further and further into poverty.

Ms. Olsen has a unique perspective on the history of these sweaters: she married into a Coast Salish family, lives among the people and has been active in the production, repair and marketing of the sweaters for decades. The book, published in 2010, is based on her Master's Thesis and I highly recommend it to anyone who is interested in hand spinning, weaving, knitting or the history of indigenous peoples in Canada. (Salish Indian Sweaters, by Priscilla Gibson-Roberts, is another informative book on the history and making of these sweaters; however, as a member of the Coast Salish community, Ms. Olsen is able to offer insights unavailable to Ms. Gibson-Roberts.)

Coast Salish never received full benefit from their sweaters. Although certain traders were known for their fair payments and respectful treatment of the knitters, many traders took advantage of the knitters' need to support their families. The traders could be abusive and deceitful, offering far less than a sweater was worth, refusing to purchase sweaters made from wool not supplied by the traders or offering barter only. As the popularity of and demand for the sweaters grew, the knitters found themselves further behind. According to Ms. Olsen, what really struck a blow to the making of these sweaters was that same popularity - Salish knitters had to compete with cheaper imitation sweaters. Rather than work with their own designs and traditions, markets demanded homogeneity. Knitters would be required to knit hundreds of sweaters with the same designs, using wool imported from New Zealand and Australia, rather than their own home grown wool. Many of the knitters lost heart; their creativity stifled, they put down their needles and refused to teach their daughters to spin or to knit.

One of the passages which impressed me most in the book occurs when Elizabeth, a knitter, brings a sweater to Ms. Olsen for sale. Ms. Olsen was disconcerted by the "distinctly lop-sided series of snowflakes she had knit as her main design (p. 261)." The exchange that follows is worth quoting in full:

"I know what you're looking at," she [Elizabeth] said. "You think I've made a mistake."
"Yeah," I said. I was uncomfortable criticizing Elizabeth's work. She was a respected elder in the community and a good friend of mine. She laughed. "You see, the thing with you people," she said, referring to my whiteness, "is that you always want everything perfect. Everything has to be buttoned down so there's no place to move. You don't like any muss, any fuss. Any little thing out of place and you start squirming." . . . "You see, in our world," she said, referring to her nativeness, "we purposely leave a coloured stitch knit out of the order of the pattern or something like that. We don't call it a mistake. It's a window. It's where spirits come and go. That's why our sweaters are so comfortable. People can feel it. Our knitting isn't all stuck up and tight. You close things up so tight, so perfect they can't breathe."  (pp. 261-262. Emphasis mine.)

Of all the things which I took from this book, the idea that demand for perfection stifles creativity strikes close to my heart. These days, we allow little margin for error in any aspect of life; in the age of social media, where everything is instant and global, where humans are publicly mocked for mistakes they make precisely because they are human, it would be wise to remember Elizabeth's words. Allowing ourselves and others freedom to be creative and express our artistic visions, especially when we don't agree with them, will not degrade our world. Rather, accepting a multitude of possibilities will expand our horizons and enrich our abilities.

If you're looking for a good read this summer, or any time of year, find yourself a copy of Sylvia Olsen's book. Along with the video below, it offers insight into an ever changing culture and its beautiful work. Enjoy.


Namaste.


Monday, 6 July 2015

Battle Fatigue: A Selfie of a Different Sort and the Question of Design

I’ve been thinking about design these days: what makes good design, where design inspiration materializes, how to choose and work with media and techniques to realize a design. Such things have been rattling about in my brain for a while. I promised myself, when I finished my teaching gig at Fibre Week this year, I would concentrate on tapestry, weaving subjects dear to my heart with materials I produced myself.

After a few days recovering from the excitement of Olds College, I settled in to work on a piece I’ve had warped for a few months. The subject is personal, painful and I’m not sure I’m ready to expose it to the light of day, but it needs to be woven, even if it turns out badly. Mistakes are our best teaching partners and the past week, I’ve been making mistakes, although many of these are turning out to be happy accidents.

The finished piece will be approximately 10.5 inches x 11.25 inches, nearly square, which can be problematic, as the eye is drawn to rectangles. I’m weaving it on a Cactus Loom, which means four selvedges, no hems or fringes. As usual, I’m weaving from the front, but the back will not be clean finished, due to some of the techniques I’m incorporating into the weaving – soumak, lettering (woven in and applied to the surface), a wee bit of embroidery for detail. The warp is 2 ply commercial bleached linen, smooth and silky, but so strong and inelastic that it shreds the weft yarns. Those wefts are hand spun singles. I chose to weave most of the piece, which is primarily white with dark brown lines and bits of red, using a yarn spun from Norwegian top. The weft is strongly spun, to the point where it nearly cuts my hands when I break off a piece, but it’s no match for the linen. Because it’s spun from top, the fibres are aligned; when they unwind, as often happens when passing a singles through the weaving shed, they unwind all at once, unlike a woolen spun yarn where the misalignment of the fibres helps to hold the yarn together. This means that the supposedly strong yarn frays and breaks unexpectedly. It also means that the weft tends to shred; the yarn which appears smooth in the ball is rough in the fabric.

Battle Fatigue: Detail 

The Norwegian singles is a prime example of why I encourage beginning tapestry weavers to learn their techniques using plied commercial warp and wefts. Weaving with this yarn is not an easy go. I could have returned to my tried and true Romney singles which I know will behave better. Why did I choose to stay with the Norwegian worsted for weft? Here’s the thing: the difficulty in using this yarn matches the difficulty of my topic. The rough surface of the fabric reflects the ups and downs inherent with the design and subject. As I weave with this weft, the hairiness of the yarn obscures the images in the weaving, ever so slightly, adding to the texture of the tapestry and reflecting the ambivalence I have towards the topic. In other words, the media become crucial to the design of the tapestry. The strong commercial linen warp, the bones of the piece, holds everything together, but it’s a tough mistress, refusing to bend to the actions of the weft. The weft becomes a physical reminder of the hard subject as it builds the tapestry. This, I think, is critical to producing good design. Not only must the weaver capture an idea in her cartoon and translate the cartoon into cloth, she must choose to work with materials which enhance her ideas and her subject. If she selects images and materials which are easy for her, if she repeats a theme because it is safe and known to work, she risks weaving a facile tapestry, boring to herself and boring to the viewer.

By weaving difficult subjects, using materials which don’t bend easily to the will, the tapestry weaver risks disaster, but she also takes steps towards a clear understanding of her subject and the materials needed to express that subject. In doing so, she may provoke her audience into questioning its perspective. Ideally, tackling a hard subject may provide healing. And so, I weave.


 Namaste.


Sunday, 28 June 2015

Wasn't That a Party?: Fibre Week 2015

Coleen and I arrived home from Fibre Week 2015 early Friday evening, both of us looking like wet dish rags that the cat had dragged in. I'm sure Mr. DD wonders why we do it every year, given that we return exhausted and I have to hide out for a couple of days just to recover from the experience. The fact is, that our appearance belies all the fun we have spending a stretch of time among fellow spinning nerds in a beautiful setting, where the conversation (fuelled by cider, soft drinks and tea) turns to topics such as, "Where does the twist really stop in a yarn?" as we gather round and watch YouTube videos of Peacock Spiders doing their mating dance.

Teaching Level 4 was a new experience for me. I teach beginners. That's my thing. I love coaxing novices down the rabbit hole that is the spinning world, or any new world, for that matter. I was nervous about moving away from my fledglings and towards advanced students, but everyone was patient and kind and once again, I found myself working with a great group of people. "Working with" is the operative phrase - many of these students know at least as much as the instructor about certain topics. Student occupations outside the spinning world run the gamut from project managers, mathematicians, artists, farmers to journalism majors. I'm learning that the trick to teaching upper levels is to step back, to utilize everyone's talents and to allow the students to tell me a thing or two or three.

Excellent math skills came in handy on Dye Day, when the assignment was Percentage Dyeing with acid dyes. By the end of day, the chart of percentage calculations on the board was a work of art. I couldn't get a decent photo of it because my camera didn't like the poor lighting in the machine shop, but this will give you some idea of the work involved:


By the end of day, the board was covered in calculations for each colour dyed, weights of fibres, stock solutions and the amounts of dye solution required for each colour. One of the assignments was to dye a 12 step colour wheel; one of the teams expanded that to 24 steps. Another group played with ombre and injection dyeing. The last assignment of the day was Rainbow Dyeing on fleece, which involves stuffing raw wool into a dye pot with some water and vinegar, sprinkling dye powders and top and then walking away with poking at the mix. The colours for that were fantastic; I am looking forward to stuffing a pot of my own.

Tending the pot

Jennifer with some of her skeins
 Assignments for this level include spinning line flax, working with bison, cashmere and camel fibres, blending fibres on combs and hackles and silk reeling.

We were fortunate this year to have two renowned silk reeling experts on campus - Michael Cook aka Wormspit and Coleen Nimetz, my travelling companion and the Level 6 instructor. Michael was our roomie. Most of the time, I sat in our townhouse with my mouth hanging open, as he and Coleen discussed the technical details of various silk moths and the fibres they produce. When Michael explained something to me by quoting a phrase in Latin, I knew I was out of my league. When he pulled out his tablet woven band with that same quotation woven into the pattern, I was done. (Old style Catholic masses and high school Latin classes just weren't enough to keep up.) I was toast and I knew it, but Michael is a friendly, gentle person who shared his knowledge generously. Both he and Coleen invited me to observe their reeling classes; Coleen kindly allowed my class to observe her Level 6 reeling. (I was happy about this because I've reeled silk three times in my life; once with Michael in a mini-workshop and twice with Coleen. Silk reeling is not applicable to tapestry weaving, at least not the tapestry weaving I do.) Because we had access to the experts, I had planned to skip the hands-on demonstration in class, but it became apparent that this would be a mistake, so I turned the assignment over to the students who did a wonderful job at reeling despite having a less than cooperative crock pot, makeshift equipment and a teacher (me) who was clueless in the art of silk reeling:


As always, the Olds Campus grounds are beautiful. I visited my poppy beds:


A large Raven was nesting on top of the veterinary clinic on campus and protested loudly every time I walked by. On the last day we had a lengthy conversation, as she squawked at me and I squawked back. (I hope no one saw me, because I'm sure I appeared quite mad.)  She would not allow me to take her picture.

The evening light at Olds confuses me every year. Olds is not that far north of my home, but it stays much lighter in the town than it does back in Regina. Here's a shot from our townhouse, taken at 9:43 p.m. on Wednesday evening. It's no wonder I can never sleep at Fibre Week:


That's it for another year. Thanks to everyone who made it such a wonderful experience, yet again. A big "Thank You" to my class, Level 4, 2015:


For fellow spider aficionados, I leave you with the video of a dancing Peacock Spider, courtesy of Michael Cook:


Namaste.

Sunday, 14 June 2015

Memories: A Tapestry Diary of a Different Sort

I love weaving tapestry samples. Nothing gives me more pleasure in tapestry than working on technical, colour and design challenges. I'm so in love with weaving samples that most of my work consists of bits and pieces of cloth, invariably tucked away in bags, in closets, out of sight, out of mind. (Have I told you lately that I'm a process person?) Those bits and pieces accumulate over the years. Eventually, they sulk, calling to me, "Do something with us, please!" I had an idea or two in mind, but, like so many things, I needed to get one of those handy aroundtoit's before I started.

Last fall, on my way to the yoga studio, I saw something in a designer clothing shop which intrigued me. In the window was a jean jacket. The back of the jacket was painted, boldly, with flowers and scrolls and curlicues and one other thing - the word "Artist" in dynamic letters above the flowers. How interesting, I thought. Who would buy such a jacket? Surely, an artist would design her own jacket; besides, most of the artists I know couldn't afford the many hundreds of dollars for the purchase price. Who else besides an artist would want such a garment? I never discovered the answers to my questions. The window display was changed and the jacket vanished - sold or not, I never knew.

That jacket started something, perhaps something unintended by the original maker, but a something for which I'm grateful. I'd been toying with the idea of stitching my tapestry samples onto garments, but, well, see the first paragraph. Adding tapestry to a jean jacket was my favourite notion. I'd worn jean jackets in my younger days. There's a bit of a rebel image attached to these garments which still appeals to me, although those younger days are long gone. Practically speaking, jean jackets are sturdy, able to support the weight of tapestry. They don't required continuous cleaning, so I wouldn't have to remove my work very often. The more I thought of that painted jacket, the more the idea of a tapestry jacket appealed to me.

Soon after I saw the store display, one of my sisters gave me an old, worn jean jacket. I took this as a sign and began adding samples. These are the first swatches I attached. (Thanks to my niece, Kasha, for the photos of me modelling.)


Each piece holds memories - the lotus was woven to mark the completion of yoga teacher training in 2014. The bottom band, "Winter Count," was a diary woven for my fortieth year on the planet. Many of my swatches resemble landscapes, perhaps because I feel most at home in a field or a forest, near mountains or water.


This is a work in progress - I'm adding swatches as the mood strikes. Although I play with the placement of each band, there are times when the design will be balanced and times when it will not, which, of course, is exactly how life goes. One day, the original jacket will disappear, buried beneath the fragments made by the weaver's hand, leaving behind marks of collected memories. Just like me.

Namaste